Thursday, January 29, 2009

Sound advice on Sound

As the title suggests, this post will be all about sound, good or bad, on the S10.

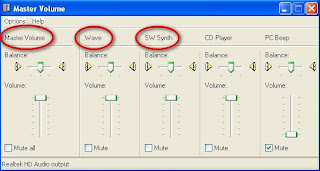
The first time I heard the S10 sound, I felt that it was too soft even for a tiny netbook. So I went to the Speaker icon (for volume) on the system tray to access the Master Volume dialog box and adjusted it to full volume but it was still soft. Later I found that you have to increase the Wave button volume and also the SW Synth button volume in order to get a decent level of sound. Now it is not too bad for its size.


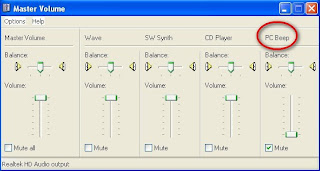
There is an audio beep when you connect or disconnect AC power to the S10. This is good as you will be alerted if someone disconnected your power but the beep is way to loud. In order to reduce this, you access the same master volume window at the system tray and set the PC Beep button to a lower volume or mute it altogether.

By the way, there is no shortcut mute button (Fn +) on the S10 so stop looking for it. You have to reduce the volume by pressing the Fn + Left Arrow key repeatedly.

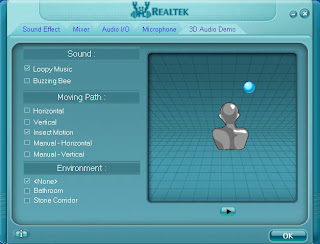
There is another speaker icon in the system tray, a more stylish one and you can access this to tweak the Realtek audio driver. Click on this and you can set the sound effect, adjust the mixer, the mic, etc. You can also run the 3D audio demo to impress your friends with the S10, if nothing else.


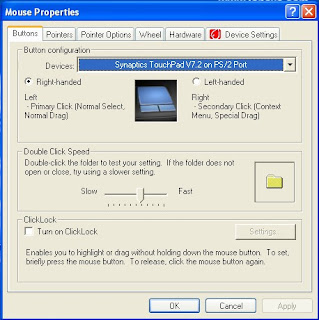
Another complaint is that the click button on the touch pad is too loud. If you want, you can open up your S10 and dampen the sound by using some tape or something similar but that is too much work. The easier solution is to use the tap to click on the touch pad itself and not to click the button physically. It's much simpler this way. By default, the tap to click is enabled but if for some reason this is not, you can access the Synaptics Touch Pad setting screen to enable it. Refer to my earlier post on the Touch Pad.


Finally the sound topic that has the most number of complaints in the S10 forums is about the cooling fan, that it is making loud annoying sound ever so often when it is on. Personally I do not find the fan 0n my S10 to be annoying and it does not come on that often. Yes it is louder than my Dell laptop but it is not as loud as my desktop so it is some where in between and definitely tolerable. Not sure if I am lucky or my hearing is bad!


If you find your fan on the S10 loud and annoying, there is no quick fix. Some users have tried different ways to reduce the noise - upgrading the BIOS (some reported no effect), removing the wire mesh, reducing the voltage to the fan, and one even disconnected the fan!

If it is really that bad, take in back to Lenovo for them to fix it. Otherwise, just get used to the sound. You may eventually like it. Cheers.


Ronald Kwok
http://cbpirate.com/s/cbp/ronaldkwok


Tuesday, January 20, 2009

Using external monitor and extending desktop

One question often asked in Forums is whether the S10 can support external monitors at resolutions higher than the native 1024 x 600. The answer is yes, the S10 will support an external monitor connected to the VGA port at various common resolutions. At the maximum end, it goes up to 2048 x 1536 so it shouldn't be a problem if you have a LCD monitor and you want to connect it to the S10.

In fact, if you just want to use the external monitor instead of the built in screen, you simply connect it to the VGA port and cycle through Fn F3 to get just the built in screen, both the monitors or just the external monitor. It will automatically goes to the maximum resolution of the external monitor by default if you have not made any manual adjustment earlier.


If you want to check what resolution the display adaptor can support, you can do the following.


1. Right click on the desktop and click on Properties.

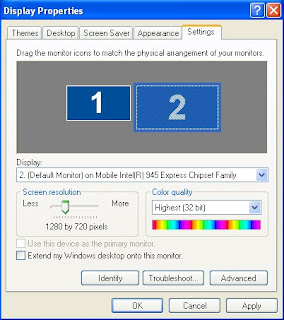
2. On the Display Properties dialog box, select the Settings tab.


3. Click on monitor 1 if it is not selected.


4. Click the Advanced button.

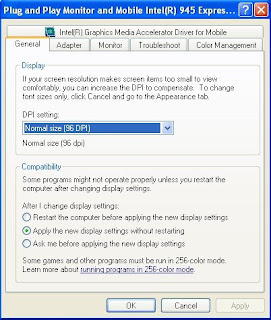
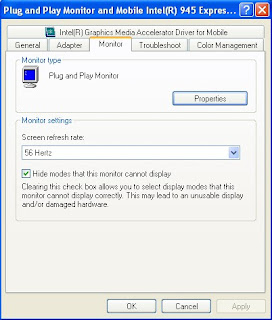
5. The display card General Properties appear, click on the Monitor tab.

6. Uncheck the box - Hide modes that this monitor cannot display - and click Apply.

7. You can now see all the resolutions that are supported by the graphics adaptor.


There is another good use of the external monitor and that is to extend the existing desktop. Here's how to do it.

1. Open Display Properties dialog box.

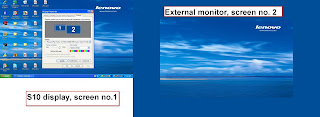
2. Click on monitor 2 (the external monitor). It turns blue.
3. Check the box - Extend my Window desktop onto this monitor and click Apply.


4. A blank background of your existing desktop will now appear in the external monitor.


5. Adjust the screen resolution as necessary.
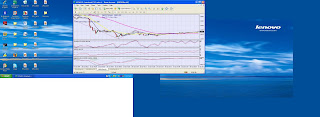
6. You can now open any window and drag it across your screen into the external monitor. (You can only do this for those windows that can be dragged i.e. those that are not maximised. Once the windows is in the external monitor, you can resize and position it as required or you can maximise it and it will fill the external screen.


The two displays forms one extended desktop and you can move from one to the other by moving your mouse pointer across the screens, it is so magical. Now you can watch President elect Obama's historic inauguration on one screen and the Forex market epic battle in another screen and not miss a single beat or a single pip.


Just in case you run into trouble after making all the adjustment, there is one safety net.

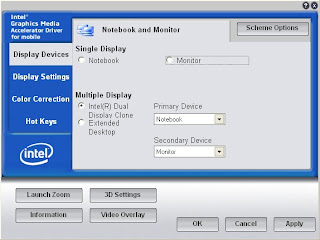
1. Right click on desktop and click on Graphics Properties....The following appears. (This is for both screens active, if only one is active, either Notebook or Monitor only will be shown.)


Now you can make changes to the Display Settings (the resolutions) to what you might not be able to do in the normal Display Properties. You can also make color corrections if so desired.


I must stop now to watch President Obama's big day on the big screen.
Ronald Kwok

Friday, January 9, 2009

Manage Energy Management

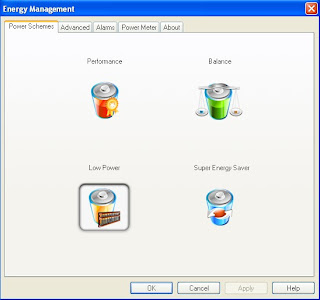
As promised in my last post, here's how you can manage the Lenovo Energy Management. To get to the Lenovo Energy Management page, look for a stylish battery icon (not the simple battery icon that shows the battery status) on the system tray. If you hover your pointer over the icon, it will show "Energy Management - XXX" where XXX is the current power scheme the S10 is using. Click on the icon and the Energy Management page appears.


Here you can see the icons for the four different power schemes pre-set by Lenovo. The icon you see on the system tray will be one of these and it is the scheme that is currently running. In this screen shot, the scheme used is Low Power and this icon will appear in the system tray. Note that the icon for the power scheme currently employed is enclosed within a square.


(Alternatively, you can access this Energy Management page by selecting the Power management options in the Start menu.)


If you want to change the power scheme to a different one, click on the new scheme and the battery icon will light up. Press the apply button to confirm and the new scheme will take effect while the icon will be enclosed in a square and the corresponding new icon will appear in the system tray.

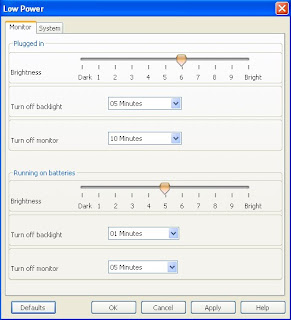
Double click on any of the icons and you will arrive at the Monitor setting page where you can adjust the brightness, when the backlight will turn off and when the monitor will turn off. This can be set separately for using the battery or using the mains (plugged in).


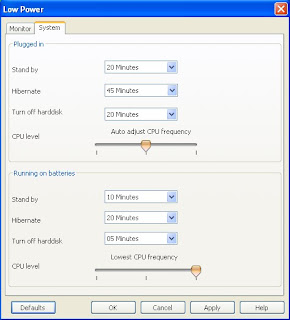
After setting this page to your heart's content, you can then move on to the next tab which is for the system setting. Here you can set the time for standby, hibernation, turning off hard disk and also the CPU level (frequency). Again you can set separately for either running on battery or plugged in.


You can make whatever changes you want but don't forget to press the Apply button to save you changes. If you have messed up the whole thing, don't worry, just press the Default button and you'll be back where you started.


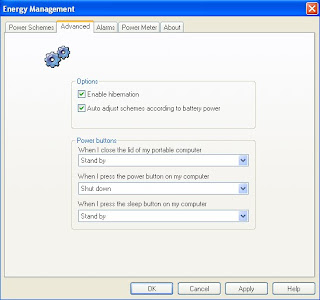
There are other tabs in the Power Management that you can click and make changes but another important one is the Advanced tab. Here you can enable or disable hibernation just like the one in the Windows Power options screen and you can let the system auto adjust to the power scheme according to the battery power or manually select a particular power scheme.


You can select what mode the system will go into when you close the lid or the reaction when you press the power button or the sleep button. If you have disabled hibernation, it will no longer be an option where it will normally appear here or in the system setting page.

A common user complaint is that the screen goes off after 1 minute or 5 minutes while watching video. This happens when the backlight or the monitor itself goes off after the preset time in the Monitor setting. To stay uninterrupted, set the time to NEVER not only in the Monitor setting but also in the System setting. Otherwise your monitor may be set to NEVER off but when the system goes into standby or hibernation, the monitor will go off anyway. Thus the Monitor setting and the System setting must be in sync to get the desired effect.


In case there's problem in the Energy Management, you can go into the Energy Management folder within the Drivers folder in drive D: to reinstall the programme. On the other hand, if you don't like too many options, you can uninstall the Energy Management programme using the Add/Remove function in the Control Panel and restore control using the Windows Power options.


The choice is yours. So don't fret, go out and enjoy your S10!


(Screen shot to show location of the power management icon in the task bar as requested by one of the readers. Should be there somewhere. Yours may look different depending on the power scheme in use.)


Ronald Kwok
http://cbpirate.com/s/cbp/ronaldkwok


Tuesday, January 6, 2009

Losing Sleep over Hibernation?

While checking on the two Lenovo S10 Forums, I found that there are some confusion between the Sleep (or Standby) mode and the Hibernation mode implementation on the S10. This is compounded by the fact that Lenovo has replaced the Windows power management by its own Energy Management.

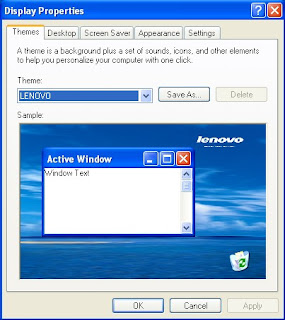
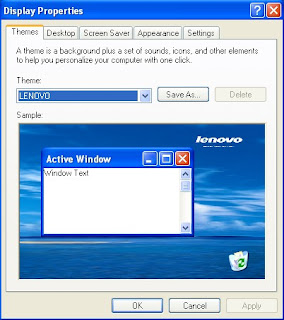
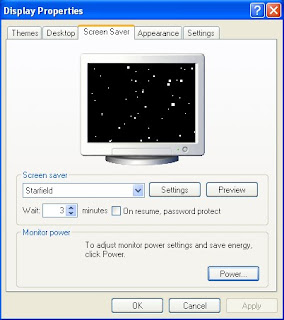
To see what I mean, get on to the Windows power management page by right clicking on any empty space on the desktop. The Display Properties window will appear as below.

Select the Screen Saver tab and the windows below will appear.

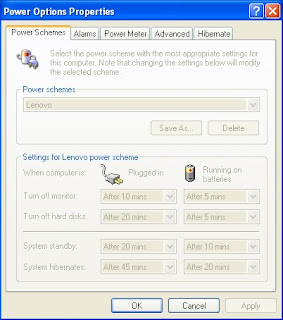
Click on the Power button and the Power Options Properties screen will appear. How MS decide to hide the power management page under the Display Properties is beyond me.

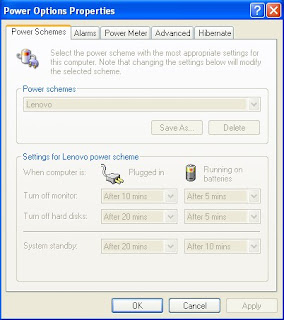
You'll find that all the options are greyed, meaning you cannot make any changes here. To make changes, you have to go to the Lenovo Energy Management window. You can also get to this Windows power options page by going to Control Panel, Performance and Maintenance and then Power Options.

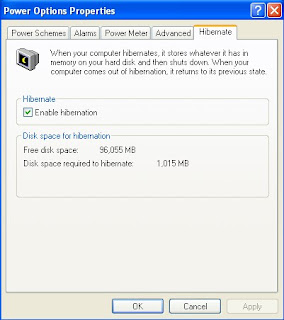
Will your system go to sleep or will it go into hibernation? It all depends on the settings on the Windows Power options or the Lenovo Energy Management. You can prevent your system from going into hibernation by selecting the Advanced tab and unchecking the "Enable hibernation" box. Don't forget to click the Apply button after any changes.


Once you have disabled hibernation and if you check the Power Options page again, you will find that the "System hibernates" line is no longer there, meaning your system will never go into Hibernation but only into Sleep or Standby mode.

What is the difference between the Sleep mode and the Hibernation mode? In simple terms, hibernation is deep sleep. You system will wake up from sleep when you touch the pad, press a key or open the lid (if it's close) but to wake it from hibernation, you MUST press the power on key.
Technically, the system will go into stages of undress, oops, I mean rest - monitor off, hard drive off, etc, based on the settings (timing in the power options above) and when it reaches the stage where only the RAM is still on, it is in sleep mode. Before it goes into hibernation, it will save the contents of the RAM into the Hard drive and the RAM itself will power off. Thus the system draws no power when in hibernation and thus is the mode best for power conservation. And your hard drive must have spare space of at least equal to the size of the RAM so that it can save the contents of the RAM before the system go into hibernation.

By the way, you can move into Hibernation mode quickly by going to the Turn Off Computer page, move the pointer over the Standby button and a dialog box will appear that says "To hibernate instead, hold down the Shift key." That is, if you have enabled hibernation. Thus you can start up you S10 much quicker by going into Hibernation instead of shutting down normally.

My next post will be on the Lenovo Energy Management itself. I need to go into Sleep mode now.

Ronald Kwok
http://ronaldkwok.atomicblog.hop.clickbank.net/

Saturday, January 3, 2009

Videocam and Touch Pad

This is a continuation of my affair with my wife's Lenovo S10. Yesterday I tested the videocam using Skype and it worked the first time. However I found the video image grainy and laggy when compared to my son's Macbook (the other end of my Skype testing. Come on, how much did that cost?) The image was also very dark but this improved when I did some Brightness adjustment at the Skype screen, Tools, Options, Video Image. The same goes for the mic that was a bit soft and by setting the mic volume to high at the Audio Setting, it became louder. The important thing is that it works and the next step is to do some tweaking to get it to be at its optimal. To get more out of the webcam, you can download this free software from Yawcam.

There are a number of undocumented quirks and finds about the S10 that I have culled from the Lenovo Forums mentioned in my last post.

1. Low audio volume. Double click on the speaker icon on the system tray to open the volume control. Set the Master Volume to maximum and also set the rest of the volume for wave, SW synth, etc to the level of your liking.

2. Annoyed by the beep that wakes up the whole neighbourhood whenever you plug or unplug the mains/AC? While you're at the audio setting above, set the PC Beep to Mute to shut out that blasted Beep.

3. There's a manual button that switches on and off the Wireless devices (WiFi and Bluetooth together), next to the One Key Recovery button. Once this is switched on, you can control the WiFi and the Bluetooth individually using the Fn F5 key. The wireless LED on the front will be blue if the WiFi is turned on or will be purple (red and blue) when the Bluetooth is on. If both are turned on, it will show the two colours alternately. To save battery power, turn off the Bluebooth if you are not using any such devices.

4. To get into hibernate mode quickly. Click to the Turn Off Computer screen where you'll see the Standby, Turn Off and Restart buttons. Place your pointer over the Standby button and a window will says "To hibernate instead, hold down the Shift key." There you have it.

5. You must have experienced it when using the touch pad on a web page, the page zoomed in to a very tiny blob or zoomed out to huge letters. That's the pinch zoom gesture of the touch pad that is inadvertently applied. The easiest way to get out of this is to go to the magnifying glass (zoom) icon at the bottom right corner above the system tray and manually select 100% or whatever level that you want. You can try to "un-pinch" the effect but it's not always a sure thing. You'll find it easier to use one figure each from both hands to zoom pinch but you'll never get the right level. You can visit the
Synaptics site to see more of the gestures for the touch pad but not all of them are available on the S10.

A much better description of all the touch pad functions and configurations can be found on the S10 itself.
1. Right or left click on the touch pad icon in the system tray.
2. Click on the Pointing Device Properties and a new "Mouse Properties" window will appear.


3. This refers to all the settings and functions of the touch pad that you can customise.
4. The best part is to select the Device Settings tab and then click on the Settings button. You'll get the whole user manual of the touch pad here.


It's a pity that the touch pad is so small that using all the available functions can be a bit difficult especially for those with big fingers. Well, at least they are there.

Ronald Kwok
http://cbpirate.com/s/cbp/ronaldkwok